Building the OGRE dependencies
Introduction
One of the main issues we're dealing with in Summoning Wars is the difficulty encountered while getting the developers up to speed with the long process of building the necessary tool-set.This is intended as a helper for setting up a build environment for projects using the same tools that Summoning Wars is using, such as OGRE and CEGUI.
Ogre has some various dependencies (some optional), that provide support for loading images, fonts, handling inputs, compression.
For some time now, the default method of delivering the dependencies has started using the same mechanism as Ogre itself, via a mercurial repository hosted on BitBucket.
Prerequisites
You will need the following tools:- A mercurial client. I'll just assume you're on Windows and using TortoiseHg. You can get it here: http://tortoisehg.bitbucket.org/
- Cross-Platform Make. You can get it here: http://www.cmake.org/
- A C++ compiler. I am using Visual Studio 2012 Express. I'll assume you are using the same thing. The last time I checked, you could download it here: http://www.microsoft.com/visualstudio/eng/products/visual-studio-express-for-windows-desktop . But it's safer to simply search for it as links to it may shift over time.
 |
| The 3 tools, as they appear in my start menu |
- DirectX SDK. This is optional, but recommended, if you are running on Windows. The last time I checked, you could download it here: http://www.microsoft.com/en-us/download/details.aspx?id=6812 . But it's safer to simply search for it, as links to it may shift over time.
You should install all the tools prior to starting performing the steps.
Steps
Clone the repository
Clone the Hg repository found at https://bitbucket.org/cabalistic/ogredeps.You can do this by going to a folder of your choice in Windows Explorer, right clicking a window background in Windows Explorer, selecting TortoiseHg from the context menu and then Clone from the submenu.
 |
| The folder I chose as my local clone. |
You should receive a smaller window where you can specify the details of the clone operation. Here you should specify the source (https://bitbucket.org/cabalistic/ogredeps) and the destination (E.g. C:\code\ogredeps). Just make sure you add the name of the subfolder to use. Mercurial will not create a subfolder otherwise. You should see that the text box on the bottom side of the window is updated according to the changes you perform. You could run the command provided there in a cmd window to get the same results.
 |
| The clone command window in TortoiseHg |
Create the solution
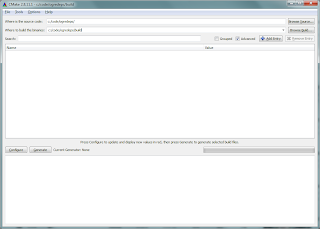
Now it is time to start CMake. Simply copy the destination you used in the repository cloning to the CMake textbox corresponding to the source code ("Where is the source code", E.g. C:\code\ogredeps\). You could use the same folder for the destination ("Where to build the binaries"), but it's recommended to create a subfolder to keep it cleaner and easier to maintain.I suggest creating a sub-folder names build, E.g. c:/code/ogredeps/build.
 |
| CMake: Specify the source and build folders |
If the folder does not yet exist, you should be presented with the following dialog:
 |
| Popup to create build directory |
Next up, select the compiler to use. You can just leave it as a default. This will mean that the target platforms are Windows Vista or later. For adding Windows XP, you will need to provide a separate tool-chain.
 |
| CMake specify compilers |
The CMake scripts will attempt to populate the configuration properties with the correct values. They will be displayed in red initially. They will also be displayed in red if they are new options to something you already configured.
 |
| CMake: auto-configured values |
 |
| CMake: pre-generation values |
Build the projects
Now, you should have a Visual Studio solution. You can go to the directory you selected as the location to build the binaries (E.g. c:/code/ogredeps/build) and launch the OGREDEPS.sln solution. |
| Visual Studio 11: Ogre Dependencies solution |
You might get some warnings, but you should receive no errors.
If you have the Output Window visible, you should see the last line:
========== Build: 7 succeeded, 0 failed, 0 up-to-date, 1 skipped ==========
You should also build the INSTALL project. That will in principle only copy the header, lib and dll files to a dedicated folder (E.g. c:\code\ogredeps\build\ogredeps\). Right click the INSTALL project and select Build from the context menu.
Once finished for the Release, repeat the project building phase for the Debug configuration.
No comments:
Post a Comment