Testing the WinCC OA extension in an WinCC-OA control script
This is part 3 of the tutorial. You can view other parts here:Part 1.
Part 2.
Part 3.
If you create a WinCC-OA extension, the final goal will be to allow new functionality available to WinCC-OA control scripts and panels. The extension is built into a DLL, which can be imported in WinCC-OA code, allowing new functions to be used.
The default WinCC OA extension built from the template contains a single function: an "add" function that receives 2 input integer variables and an integer output variable.
Viewing the existing list of functions and their implementation
Please open the solution and view the file "mySampleApplicationExternHdl.cxx". The list of functions (along with their parameters) is displayed at the top. This is where the names are mapped to indices, so the order in this list is very important:static FunctionListRec fnList[] =Lower, in the execute function, which gets called from the WinCC-OA script, you can find an enum to store identifiers for the functions. Their order is also important, as the first identifier shall be used to call the first function defined in fnList, the second identifier shall be used to call the second function defined in fnList, and so on:
{
// TODO add for every new function an entry
{ INTEGER_VAR, "add", "(int a, int b, int &sum)", false }
};
enumThe actual functions calls are identifier according to their index and the executed code is given as a sample in a switch/case enclosure.
{
// TODO add here all your function numbers in the sequence used in the FunctionListRec array
F_add = 0
};
Create a new WinCC-OA project
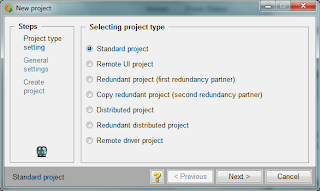
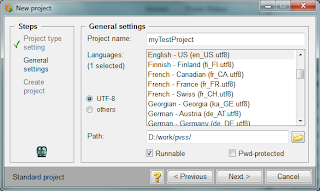
Start the WinCC-OA project administration with administrator rights and create a new Standard project. Select the languages you prefer and place it in a path of your choice, (but with no blanks in it) and create it. If you encounter an error, make sure you started the WinCC-OA project administration with administrator rights (Right click; Run as administrator).Copy the extension DLL to the WinCC-OA project
In order to use the built DLL (you did build it in Part 3, didn't you?), you will need to copy it to the bin folder of the newly created WinCC-OA project.You will generally want to copy the Release version of the DLL, so if you build both, copy the Release version only.
Integrate the extension into the WinCC-OA project
Start the WinCC-OA project. The gedi should start automatically. Create a new control script to test the function provided by the DLL.In gedi, create a new control script, name it as you please (I used the ingenious name: sample_01.ctl).
Next, write the code for it. Something simple, as the following code should be enough:
#uses "mySampleApplicationCtrlExt"
void main ()
{
int nLeft = 100;
int nRight = 42;
int nResultSum = 0;
int nFunctionReturn = 0;
nFunctionReturn = add (nLeft, nRight, nResultSum);
DebugTN ("Values: ", nLeft, nRight, nResultSum, nFunctionReturn);
}
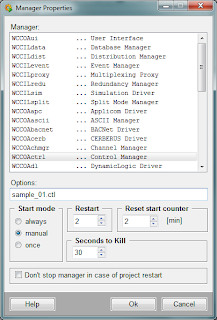
Save the file and add a new manager for the new script to the project using the WinCC-OA console.
Finally, execute it.
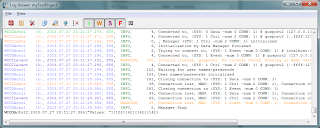
You should see the result data in the log viewer
That concludes the steps needed to get a running WinCC-OA C++ extension. Possible next steps include:
- test more return types
- include more complex functionality with additional dependencies and see how it plays out. You may need to create a more C like interface to provide management of system resources.
- have fun with it.


No comments:
Post a Comment